Pancakes

Pancakes, pancakes, PANCAEKS.

Oh, where do I begin talking about one of the most amazing simple foods man has ever bothered to perfect? Pancakes are basically pan-fried batters of flour, milk and eggs, with myriad variations depending on which part of the world (or kitchen) you’re in.

Alas, this is not a post about pancakes. Well, actually it is, but I won’t pretend to know that I know much about pancakes or drone on about its history because anyone can get that information, and also because I HAVE PICTURES. I know people dislike reading walls of text, so I’m gonna just serv- I mean, show pictures. Also, sorry, I am not going to share this recipe with you because I’m selfish like that.

AWSM FLUFFY, MOIST AND THICK PANCAKES

1: Equipment (well, sort of)

2: Ingredients

3: Dry ingredients are mixed together

4: Wet ingredients are mixed together

5: Wet ingredients are beaten till bubbly

6: Wet ingredients are poured slowly into dry ingredients.

7: The end product! Well, almost.

8: Butter is melted in microwave and added to batter

9: Pan is heated on low fire

10: PANCAKES ARE COOKING!

SERVE IT UP (with a ridiculous amount of butter and golden syrup, although I'm negating the bad calories with low-fat Naturel margarine and honey)

Pull a Biology 101 on it... nyum

AND NOMS THE FUCKING THING. GOOD GOD. Do you see the awesome fluffiness of that thing?! It lasts me for 2 meals! TWO FREAKING MEALS!

AWESOME FLUFFY HOMEMADE PANCAKES THAT DIDN’T COME OUT OF A BOX: DONE.

French bread attempt #2 (21st Sep)

Remember my first attempt at making French bread? Well, yeah, I tried making it again, and this time, it turned out a little better than the first time. Recipe remains the same, ONLY I figured out 3 days later that I had been using the wrong measuring spoon all along. My Twitter friends would know. LOL. Let’s just say I found out the answer to why my bread has been salty. *Coughs*

So anyway, I’ll just let the pictures do the talking~

Stage 1: Shaggy Dough- when the water, yeast, flour and salt are first mixed with the balloon paddle and laid to rest

Stage 2: After the dough rest

Stage 3: After kneading, form it into a ball with seams side down

Stage 4: Place ball in oiled bowl, covering all of dough's surface with oil and leave to rise in a plastic-covered bowl

Stage 5: Leavening, where dough is laid to rise for 2 hours. Dough is punched down to release air.

Stage 6: Second fermentation- dough is removed, punched down, and formed into an oblong and laid to rise for another 20 minutes

Stage 7: Dough is flattened into a rectangular shape

Stage 7a: Dough end is pressed down into the middle using the edge of the hand. Repeat.

Stage 7b: Dough is flipped 180 degrees and tamped down to be sealed, similar to step 7, only the handwork uses the heel of the hand instead of the edge of the hand. Repeat.

Stage 8: Dough is extended and seams are placed side down onto a slightly damp tea towel to rest for 15 minutes

Stage 9: After 15 minute rest, 3 scores are made downwards

Stage 10: Hot oven @ 425 F, cup of water thrown into the bottom, and in the bread goes

Stage 11: Wait as the dough transforms into a bread!

Stage 12: Remove bread when browned. It will be done when the colour is a healthy, dark golden brown. This should bake for about 20 minutes. Looks YUMMY!

Stage... Well, this isn't a stage actually. This is the most amazing part: CUTTING THE BREAD! The crust should be CRISPY and should give a pleasant, crunchy crackle when cut. For this recipe, the crumb should be dense, moist and full of holes of various sizes!

HOME MADE FRESH FRENCH BREAD: DONE.

PS:

I HIGHLY recommend you hide your bread in a safe place if you’re not going to be around for a long time. Or else you will face a horrifying shock the next day when you wake up to eat it:

A horrifying shock like finding out that's the only piece left for you. THE ONLY PIECE LEFT FOR YOU. Hur hur hur.

Chicken Pie attempt 1 (Done 26th Sept)

I’m a (fairly recent) Twitter addict, and I follow various cooking accounts for inspiration and cooking tips from the experts, since I’m not very creative when it comes to being in the kitchen, having been brought up on very humble but plentiful of cheap, low quality, really bad tasting food; that, coupled with a palate far removed from the ones my family members seem to share (which is basically anything that’s over-salted, over-sugared and over-spiced), I often had little to no interest in the cuisines my mother partook in, most notably Malay Asian and Northern Indian.

So I was rather pleased when the Food Network tweeted their Recipe of the Day: Light Chicken Pot Pie, a lighter version of a familiar family dish that we used to have once every few months when Dad’s pay was in (sort of in a celebratory fashion, since it was a rather rich and ‘expensive’ food to make back then). Mum’s version called for light soy and oyster sauce as well as boiled eggs on the top, a recipe which I would classify as ‘Asian-inspired’.

So, feeling a tad nostalgic for a home-made pie (something which I acknowledge was one of the rarer foods that my mum did right) after not having any meat pies for a good 4 or so years, I resolved to try making my very first “real” meat pie (and not Gordon Ramsay’s sheperds’ pie as I originally planned).

The recipe was loosely followed as I made a few amendments, most notably with the pie crust; I followed my mum’s original suggestion of a sweet rich shortcrust. I would, however, discourage you from using this particular pastry as the sweetness does not go with the herbs used – the rosemary and thyme have their own natural aromas that ought to stand out on their own, and sugar will just destroy it by coating it all in sickly sweetness. You can still use the recipe I used below, but you just need to omit the sugar. If, for some reason you WANT to put sugar in, then… by all means. Some people might like it. Heck, my brother liked it. I didn’t enjoy it at all. 😦

I also left out the sour cream as I didn’t have much left, though I would recommend adding a (light) cream to add on a little richness and moisture to the meat filling. I had left over filling, so I reheated some and added sour cream and decided that I didn’t like the slight tang that came with it, though I fully appreciated the creaminess it gave. I also added Rosemary to it. This is a fairly versatile recipe where you can add and remove ingredients as you like (except maybe for the pastry), such as adding peas and corn or removing carrots. Up to you, really.

For 8 servings (or 16, depending on how small you cut it)

Ingredients for filling

  • 4 chicken breasts, de-boned and de-skinned, cubed into bite sized pieces (for reference, approx. 0.25 of half of your thumb’s length, but same thickness)
  • 4 small potatoes (russet is good)
  • 1 large carrot, cubed into the same size as the meat chunks (or as much as you want)
  • 1 large onion (preferably yellow onions, since it’s sweeter and goes better with olive oil)
  • Approx 2 tablespoons of Olive Oil (EVOO is fine)
  • About 2 cups of Chicken broth or bouillion (I made my own from sauteeing 1 tbsp of the chopped onions in vegetable oil, 2 tbsp of Knorr’s chicken essence, 2.5 cups of water and then boiling it with the left over bone and cartilage from the chicken keels)
  • 1.5 teaspoons of dried Thyme*
  • 0.5 teaspoons of dried Rosemary*
  • 1/3 cup of Milk (I use reconstituted, powdered milk, but you can use any type you like- the richer the milk, the thicker the end product)
  • 3 tablespoons of all purpose flour
  • Salt and Pepper to taste

*A note on the herbs: It’s pretty rare to be able to find fresh western herbs in South East Asia, and in my local Tesco, the dried ones always seem to be out of stock. Obviously, using fresh herbs are better, and if you manage to get your hands on any, just multiply the portions thrice.

Ingredients for sweet, rich shortcrust pastry

  • 500 g all-purpose flour (a.k.a Tepung Gandum, Wheat Flour, etc)
  • 250 g butter – cubed and kept cold and hard (most bars of butter sold in Singapore/ Malaysia are by default, 250g bars, so use 1 bar)
  • 5 – 8 tablespoons of ice cold water
  • 5/8th teaspoons of salt (as the original recipe calls for 1 pinch of salt per 100g of flour, and 1 pinch = 1/8th a teaspoon, I rounded the salt down and used 1/2 tsp)
  • 4 tablespoons of caster sugar (you can leave this out!)
  • 1 large egg

Utensils needed:

  • large wok, stir-fry pan or pot
  • small saucepan
  • large wooden spoon
  • spatula
  • chopping board
  • chef knife
  • pastry board or work surface
  • rolling pin
  • measuring cup and spoons
  • kitchen scale
  • large bowl (approx 20″
  • small bowls
  • cling wrap
  • 22″ pie pan, preferably glass, but if you don’t have it, an aluminium/non-stick is perfectly acceptable

Method

Prior to cooking, wash your potatoes well and put them in a pot of water to cook over medium heat for about 10-15 minutes.

You will be making the dough first.

  1. In a large bowl, sift the flour, sprinkle the salt evenly and make a well in the middle. Make sure your hands are perfectly dry.
  2. Using ONLY YOUR FINGERTIPS, add 1/3 of the chopped butter chunks into the well and rub the butter into the flour. If you’re unsure about this, go to youtube and search for the “rubbing in method”. This is the easiest pastry method, so don’t panic.
  3. Add the butter in similar amounts until you get a mixture that resembles fine breadcrumbs.
  4. Add the sugar and spread it around evenly into the mix if you want it in.
  5. Make a well in the middle again. Whisk the egg in a small bowl and pour it into the well. Mix evenly with a spatula.
  6. Add the iced water in stages of 1 tablespoon at a time and knead the dough.
  7. Continue until you’ve obtained a pliable dough that’s somewhat soft yet firm to the touch. It SHOULD NOT feel soggy, mushy or tough. Amend accordingly.
  8. Roll the dough into a ball and cover with cling wrap. Leave it to chill in the fridge until you’re done with your filling.

Preparing the filling

  1. Drain your potatoes and cube them. You can leave the skin on if you wish, though I personally would remove them. Set aside.
  2. In a small saucepan, boil the chicken broth/bouillion together with the carrots and thyme on med heat for 2 mins and then switch off.
  3. In the large wok/pan/pot, sweat your onions in the olive oil on low-medium heat til they’re soft. This should take around 6 minutes.
  4. Add the flour gradually and toss it around til they’re lightly browned or toasted. DO NOT BURN OR OVERCOOK. If you burnt them, throw it away and start over unless you like the taste of burnt carbs in your pie.This should take around 2-3 mins.
  5. Add all the milk, stir, then add the carrot-thyme infusion.
  6. Lower heat to small, stir and simmer mix until it thickens and has the viscosity of tomato sauce. This should take about 10 minutes, give or take 3.
  7. Season with salt and pepper. Taste. At this stage, it should be slightly less flavourful than the end product because it’s not totally dried off yet. Amend if necessary.
  8. Add chicken chunks. Stir and mix around and sprinkle the Rosemary. Continue cooking till it’s very thick and creamy. Set aside to cool. IT SHOULD NOT BE WATERY OR SOGGY. It should come together and stay together on a large spoon.
  9. Lightly butter your pie dish if you’re using an aluminium dish. Not necessary for glass or non-stick.

Rolling out the pie dough

  • NB: Shortcrust pastry should be handled with respect and care. DO NOT savagely punch it, knead or roll it out excessively. The longer it is out in a warm environment, the more risk you’re taking with the fat melting before it hits the oven, spoiling the crumbly texture and making it hard to work with. DO NOT handle it too much because human bodies are WARM. Try to use heat-neutral utensils like a rolling pin or spatula when you can. If it sticks, DO NOT PULL AT IT. I have seen a lot of people try to pull, push and even tuck at their pastries when all you need to do is to roll it back out in the opposite direction, FLOUR your equipment and try again. Most importantly: WORK WITH CLEAN, DRY HANDS!
  • A visual aid for you
  • Watch that visual aid come to life! Well, sort of.
  • Sorry I don’t have pictures for this. I was too engrossed with rolling the dough out :3
  1. Preheat your oven to 170 degrees celcius if you have a fan setting. If not, use the top and bottom heating feature and turn it up to 190 degrees celcius.
  2. Wash your hands well and make sure they’re perfectly dry.
  3. Flour your hands, pastry board/work surface and your rolling pin.
  4. While in the cling wrap, shape the pastry into a ball.
  5. Divide the dough into 2 parts in a 2:1 ratio.
  6. Refrigerate the smaller portion of the dough and roll the bigger portion into a ball and place it on the work surface.
  7. Firmly but gently press the rolling pin down in the middle and PUSH OUT.
  8. Roll it out about 2 or 3 times, making sure to keep the thickness even.
  9. Turn the pastry halfway quarter clockwise and repeat step 5.
  10. After a full 360 degree turn, decide if the thickness is enough for you. For this pie, a rolled out thickness of 2-3mm is sufficient.
  11. Butter your dish if necessary.
  12. After you’re done, roll the pastry onto the pin and line it over the top of your pie dish and gently tuck the pastry into the bottom and up against the walls of the dish. Remove any excess and save it for decorations (i.e. cut out shapes to place at the top) later.

Filling the lined dish

  1. Repeat the dough rolling process for the pastry crust with the remaining dough after you’ve filled the inside.
  2. Cut a cross slit on the top of your pie (again, sorry for the lack of pictures!) for the air to escape and brush with a glazing agent like sugar water, milk or eggwash. Whichever one is fine, really. (actually I didn’t do this step, but I should have. Really.)
  3. Pop it into the oven
  4. Set the timer for 20 minutes…
  5. … And wait.

You will know your pie is done when the bottom pastry is brownish. If not, you can see whether it is brown on top.

Since I didn’t glaze my pie (or rather, forgot to), mine didn’t have much maillard browning going on at the top.

Cut your pie into your desired serving sizes…

Take a cross sectional picture of the yummy goodness marred oh so annoyingly by bad photography on a terrible cameraphone camera…

…. AND SERVE.

Delicious chicken pie, DONE.

French loaf attempt #1… and less than perfect profiteroles

So this is supposed to be my 3rd or 4th post (by right) since I had planned for this blog for quite some time and have been actively experimenting with cooking for a couple of weeks prior (and after watching Julie & Julia…!). The thought of making my own bread came up a couple of weeks ago when I bought a loaf of baguette from my neighbourhood Tesco (Seri Alam) to eat with my newly learnt ‘Perfect Scrambled Eggs’ (a truly delicious and amazing recipe from Gordon Ramsay, who I will reference quite a bit in this blog).

It was one of the most terrible experiences I’ve ever had with eating a loaf. It was so ridiculously dry and dense, and I reckon it had the potential to be a murder weapon if one so desired. It was rock solid, the crust wasn’t even crisp and cutting into it with a bread knife was a workout in itself. Eating it was even worse, and practically left my mouth with scars from all that hard masticating and sharp edges of the crust, with my gums bleeding on a couple of occasions too. I tried rectifying it later by steaming it first for about 10 minutes before popping it into the toaster at 150 centigrade for 10 minutes topped with butter. It KINDA worked a little, as it wasn’t so rough on the palate after that, having had time for the crumb to absorb the moisture and the butter, although the overworked gluten meant the crumb was too tough and dense.

A truly terrifying experience, and the most wasteful RM 1.69 I ever spent .

So anyway, back story aside, I read up pretty excitedly on French loaf recipes, methods and watched videos on how to go about making one. The ingredients for a classic French Loaf is mind bogglingly few- only 4. I was pretty intrigued that a simple mix of flour, water, salt and yeast could turn into one of the most delicious form of foods ever discovered by men- and also one of my favourite foods ever.

So this morning (which I might tend to call “yesterday night”, since I slogged in the kitchen from 1 – 6 am to do a variety of things including cleaning), I decided to try making my own French loaf. I was running low on bread flour (which has a higher gluten content specifically for bread making purposes), so I had to halve the recipe. I decided on this ‘Perfect French Loaf‘ recipe from Jaden Hair of Steamy Kitchen based on the how the loaf in the picture turned out (golden brown) together with the simplicity of the ingredients required (the ones from AllRecipes called for other ingredients like butter, milk and eggs, which I wanted to avoid as I was running low on all of them too, esp the eggs which were required for my profiteroles).

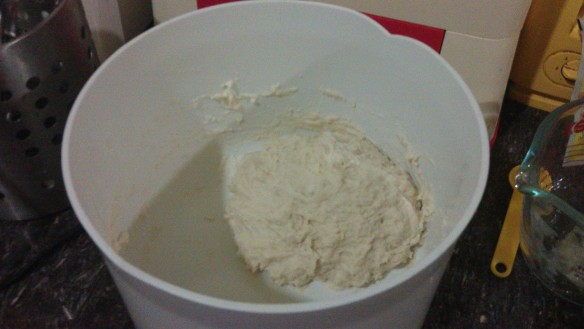
So I measured everything out as per stated by the recipe, mixed it using my hand mixer. This is post-shagginess, and after letting it rest before mixing it again:
After that, I spent about 10 minutes kneading it trying to achieve a satiny, smooth texture.  After sweating like a pig (even with the fan on and circulating) and hands tired from all that pushing and pulling, I tried googling bread troubleshooting- because I was so worried that it didn’t achieve a satiny look and feel like how the picture on the blog looked.

Now, all I had was my the 4.3″ screen of my phone, two dusty, floury hands and a shitty WiFi connection with only 1 bar as my phone was downstairs while my router was upstairs. So it was a harrowing and clumsy back and forth between my dough and my phone trying to find out why my bread wasn’t satiny even after kneading it for so long. In the end I came across a SIMILAR question on an artisan baking site, but as usual, people were being dolts and the discussion over a simple bloody question escalated into a uber long, walls of text bitchfight over butthurt egos by people who obviously need to spend less time on the internet and more time in the kitchen.

So anyway, the point was that my question was unanswered, so I decided to just stop kneading it 5 minutes later (because I read that the dough should not be overworked lest the crust turns out like chuck norris’ bollocks) and put it aside for resting by placing my dough into an oiled bowl and then a plastic bag over it.
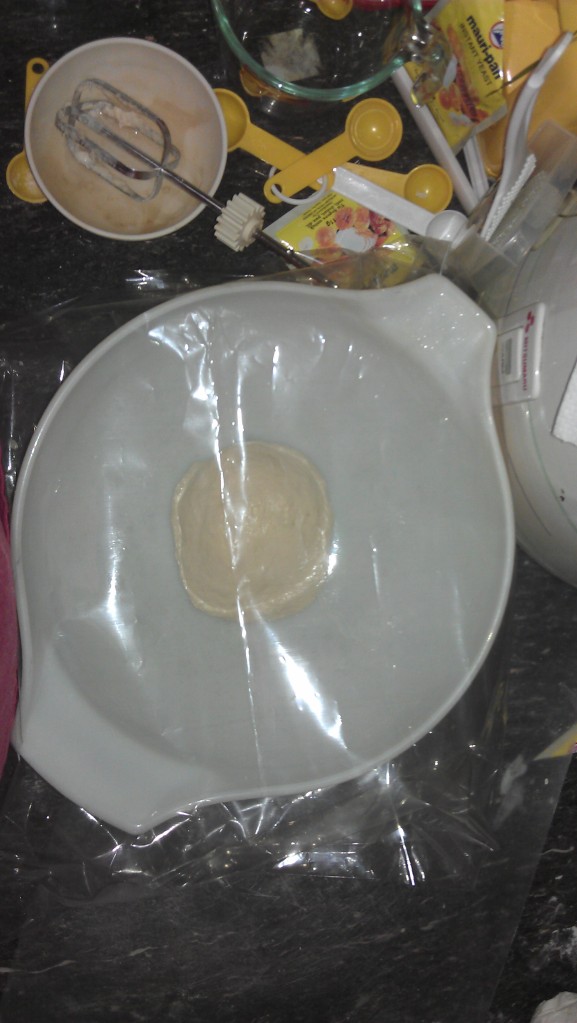
So I sat down, somewhat tired and tried going through the steps so I could commit it to memory… when it suddenly dawned on me:

I halved the recipe… but left out halving the salt.

I uttered one of the loudest fucks I ever, tweeted about it and scrambled to Google (my BFF) to try troubleshooting for over-salted bread dough. Someone over on Yahoo Answers suggested making a salt-less dough and mixing the two together. Others said to just throw it away because nothing could be done.

So with not much more than a cup of bread flour left, I continued searching the net for more ideas, but sadly, couldn’t find any more. Or maybe I wasn’t searching properly, IDK. I just left it alone and hoped for the best.

I was supposed to let it rest for 1.5 hours, where, 1 hour into the rising process, I was to preheat the oven to 220 centigrade. I knew that too much salt would be retarding the activity of the yeast- or probably even kill those little buggers off outright, so I hoped for the best that I didn’t actually kill them off, and on an utterly random idea, I switched the oven’s light on to try to make the yeast work faster by making the environment warmer.

It didn’t actually work, because the light was just too weak. So I cranked the heat up to the 60 centigrade mark and let it preheat while I went to clean my stuff up. It was sufficiently warm inside, so I turned the heat back to 0 and placed my dough inside, again, hoping for the best.

I busied myself making pate a choux for the cream puffs I wanted to make for my brother and mum while waiting for the dough to rise… and then I made ANOTHER mistake.

I completely forgot that I only had 2 eggs instead of 4 and measured the butter, salt and sugar for a recipe calling for 4 eggs. And I realised that only after I boiled my butter and water mix.

Doh.

Panicking because I didn’t want the butter mix to go to waste, I decided on stirring the mixture, measuring the volume out and then halving it. It was an imperfect idea from the start, since the mix could never emulsify or stay together long enough for me to adequately measure it out and halve it.

While stirring my flour into it, I intuitively knew that there was too much water and not enough fats and that it wouldn’t turn out very well. So I added a little more flour (about a 1/4 cup more) in the hopes of salvaging it.

I should have just started over, but then my family’s not very well off and butter is a rather expensive thing to have, so I tried to salvage what I could. I ended up having an unnervingly soft pastry dough, though. On hindsight, I should have just frozen the mixture in an even container and divided the resulting frozen thing into two. I won’t know if it would actually work perfectly, but hey, it couldn’t be worse than my initial method, right?

Anyway, it surprisingly SORTA worked, although my shells came out without much of a good rise and with a flaccid softness to it (which I detest but my mum liked -shrugs-).

To me, a good profiterole shell should be hard and firm on the outside, airy, empty and dry on the inside, but with a good, tender mouthfeel that doesn’t suggest dryness or overdoneness- which was exactly what I achieved on my first try with Julia Child’s recipe (which is currently my favourite, although I made minor amendments to the baking time and sugar content, which I will blog about in a separate post). This one was a little undercooked inside 5 minutes into the baking time, so I lowered the temp to 150 and baked it a little longer for another 5 minutes.

So all in all, the baking time was reduced by about 5 minutes from the original 15 needed.

While my profiteroles were baking, I set about making a faux whipped cream with butter, sugar and milk. Which honestly sucked monkey balls because the amount of butter used was too little to properly whip and distribute the sugar inside well enough- the end result was grainy and crunchy, really disgusting, though my brother was polite enough to say it in a nice manner. LOL. I learnt that I should continue beating it until I can’t feel the crunchiness…. hmm.

After completing my failure of a profiterole, I checked back on my dough… and was so surprised and pleased:

IT ACTUALLY WORKED! My dough had risen and almost doubled in size! In my excitement and haste to actually work on it, I forgot to snap a picture of it. Doh.

So I did the tucking thing and karate chop thing in and let it rest on a damp tea towel for about 10 minutes:

And then I transferred them out to make scores, which was honestly the most exciting part for me. (I’m weird that way.)

Heated oven: Check
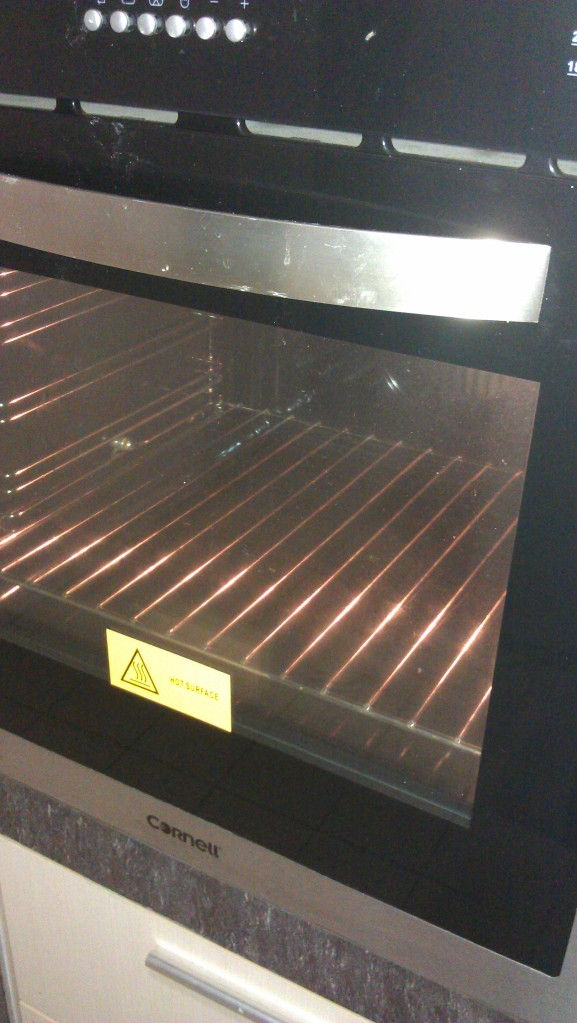
Steam maker: Check

Loaves in oven: Check

And so the agonizing wait began. Well, not really, since I had Josh Groban to accompany me through the lonely night. Heh.

My excited thought: OMG IT ROSE!

But there was still about 20+ minutes to go.

About 5 minutes or so later, I got a terrible shock: The one at the back burst open! I almost felt like crying. It appears I need to practice more on my sealing and shaping method. 😦

The end result: A loaf with a nice, crisp crack upon slicing, but with a salty dense crumb
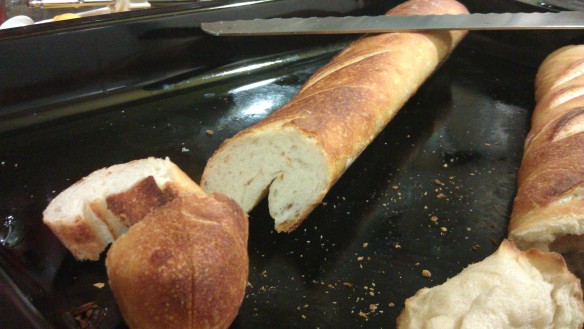
The one that burst is on the right:

Profiteroles (sorta) saved the day! nyom nom nom~

And that concludes my suuuuper long first post. It was a mistake-filled day, but my motto has always been: if I don’t make mistakes, I’ll never learn! (I don’t care if I’m trying to make myself feel better about my innate clumsiness) I shall attempt to make a new loaf after I’ve gone to get more bread flour. Til then, bon appetit!